Photobucket Photobucket Photobucket Photobucket Photobucket Photobucket

Thursday, May 31, 2012

Foodie Week Extended - Margarita Margarita Salsa

Hello!

Today I'm sharing the absolute best salsa recipe ever!  EVER!  One of my bestfriends, Margarita gave my Dad her Mom's recipe back in high school and we've been using it ever since - it's never not delicious!  I think it was easier to give my Dad (who's a salsa-addict) the recipe rather than constantly bring over bottle after bottle after bottle after vat of homemade salsa!  Here ya go...

Margarita Margarita Salsa Recipe

Ingredients:
5 tomatoes
1 Jalapeno
1-2 Serrano Chile's
Garlic Salt
Kosher Salt
Cilantro
Water
*Onion (optional)

Directions:

Boil tomatoes, jalapeno and chile's until the skin starts coming off of the tomatoes.

Remove from heat and drain.  Peel tomatoes and take the stems off of the jalapeno and chile's.

Place tomatoes, jalapeno & chile's into blender or food processor along with garlic salt and kosher salt.  Add a small amount of water, less than 1/4 C at a time, and blend on low until well blended.


Taste for flavor.  Add salt - you may need more - its up to you.  Once you've added salt, add cilantro leaves and pulse.  Don't over mix.


*We add onion to ours because we like it, but it's not in the original recipe.  I quarter half an onion and add it to the blender before adding the cilantro...*


And that's it!  I over mixed this batch, I like it chunkier than I made it... I also forgot and added the cilantro before tasting... I usually try to do this off of memory and sometimes I mix things up a little. 

Thanks, Margarita, for always sharing your family recipes, family, laughter and love with me! 

That's it for Foodie Week!  Yay!  I'll be back Saturday with a fun, weekend project for your kiddo's to enjoy!
Andrea


Wednesday, May 30, 2012

Foodie Week (Extended) - Beer Can Chicken

Good Morning!

Today I'm sharing a recipe for Beer Can chicken... which may sound a little "down in the holler", but it's an easy and tasty BBQ recipe!  We made it for a family bar-b-que on Sunday night... it took a little longer than we'd accounted for, but it was worth it! 

{Recipe courtesy of FoodNetwork.com}

Spice Rubbed Beer Can Chicken

Ingredients

Spice Rub:

Directions

Heat a gas or charcoal grill with a lid big enough to accommodate the bird. Put a drip pan below the grates.

Mix the ingredients for the Spice Rub until they are well blended. (This will keep, covered, in the refrigerator for 1 week.) Rub it all over the chicken, inside and out.


Open the beer and take a big swig or just pour out a couple of ounces. Sit the chicken on the beer can so the legs are at the bottom and the wings are at the top. Stand the beer can on the grates over the drip pan. Put the cover on and cook over indirect heat until the juices run clear, about 1 hour. (If using charcoal, push the coals to 1 side so the chicken is not over direct heat.)


Note: This chicken can also be cooked in a 350 degrees F oven. Just stand the beer can in a shallow roasting pan and cook about 1 hour or until juices run clear.


This chicken was delicious.  We did use a meat thermometer so check the chicken, make sure it was cooked through and through.  I got our 2 whole chickens from Costco, I believe it was $9 for the 2, which is an exceptional price, considering you can easily spend $6 on 1 lb of chicken tenders!  We ate one of the chickens the night of the BBQ and I've made a few freezer meals (enchiladas, chicken parm) from the other chicken...

Just a few notes:
- Don't forget to check your chicken's cavity... they're often packing!
- Don't forget to rub the seasoning in the cavity - it'll really help get the flavor throughout your meat.
- Be careful to put the chicken over INDIRECT heat!  We tried this recipe before and caught our chicken on fire... we also put our chickens in disposable foil pans to catch the drips... again, trying to avoid fires. 

Recipe Review (1-10, 10 being awesome)
Taste: 9 - the dark meat is really good, the breast lost some of the flavor
Tenderness: 10 - super tender.  Meat was falling off the bone
Cost: 10 - so inexpensive!  You can get your chickens from the groceries stores as well, they often have excellent deals on whole chickens

We'll be making this recipe throughout the summer... for all of the reasons listed above!

I'll see you tomorrow with my friend, Margaritas, salsa recipe!
Andrea

Tuesday, May 29, 2012

Foodie Week (Extended) - Lemon Bars

Hello!

Barely squeaking this post in, huh?

Okay, so I know that I raved and raved and raved about the Rubi-Berry Cobbler and how berries remind me of summer... but so do lemons... so on the same day that I made the Rubi-Berry Cobbler, I also made Lemon Bars!  I figured, since my oven was on and I had some sweet smelling Meyer Lemons... well, might as well make a batch!

My friend Michelle of Front Row Friends emailed me this recipe last summer and I love it!  I think I've preached from a soapbox mentioned in passing that I don't like an overly sweet lemon desert.  I feel like it defeats the purpose of using a tart lemon.  These lemon bars are a perfect combination... I made a few slight variations, but mostly stuck to the recipe!

{Photo and recipe courtesy of Front Row Friends}
Lemon Squares
Crust
1/2 cup unsalted butter, softened
1 cup unbleached flour
1/4 cup powdered sugar
1/4 tsp. lemon extract
pinch of salt

Preheat oven to 350 degrees. Thoroughly butter an 8" square pan. With an electric mixer, cream all the ingredients till soft and smooth. (Or, in a food processor, till it forms a ball.) Press dough evenly into pan and bake 20 minutes. Meanwhile, make the topping.


Topping
2 eggs
1 cup sugar
1/4 tsp. lemon extract
juice and zest of 1 lemon
1/4 cup unbleached flour
1/2 tsp. baking powder


With electric mixer, beat eggs well and gradually add sugar, until mixture is thick. Gradually add remaining ingredients. Continue beating until crust comes out of oven. Pour lemon mixture over hot crust, return to oven and reduce heat to 325 degrees. Bake 30 - 35 minutes till top is golden. Remove from oven and run a sharp knife around the edge. Cool 20 minutes. Cut into squares, remove from pan and sift powdered sugar over the top.
I didn't use an electric mixer, I just used a whisk, but it was just laziness.  I didn't feel like hand washing my beater and mixer bowl, I just wanted to throw the utensils into the dishwasher.
I forgot to run a sharp knife around edges immediately and paid for it.  My bars, while super yummy, were not pretty.  Luckily, my stomach doesn't discriminate over pretty food.
I also added lemon zest to the crust - it just adds a little extra tang.  I also used the zest of 2 lemons for the topping.  Remember, I like the tart of the lemon, so if you prefer it a little sweeter, then don't add the extra zest.
Yum.  Yum. Yum.  Like having a piece of summer in your mouth.  I made these on Sunday and my the time I went to bed Monday, they were gone.  Gone Gone Gone.  My husband and I really like lemon bars. 
I'll be back tomorrow with a yummy WHOLE chicken recipe and method!
Andrea

Monday, May 28, 2012

Foodie Week Extended - Grilled Corn Guacamole

Happy Memorial Day!

Today I'm sharing a super tasty recipe from Ree, The Pioneer Woman.  Yes, 2 of her recipes in one Foodie Week - She's that amazing.  Her recipes are that good.  THIS recipe is better than that good - it's superb guac!  Supyumguac!

{Photo & Recipe courtesy of The Pioneer Woman}

Recipe: Grilled Corn Guacamole

| | |

Ingredients

  • 3 ears Corn, Shucked
  • 6 whole Avocados, Diced
  • 1 whole Large Tomato, Diced
  • 1/3 cup Onion, Finely Diced
  • 2 cloves Garlic, Finely Minced
  • 2 Tablespoons Diced Fresh Jalapeno
  • 1 whole Lime, Juiced
  • 1/2 teaspoon Kosher Salt
  • 1/4 teaspoon Ground Cumin
  • 1/2 cup Cilantro Leaves

Preparation Instructions

Grill corn until nice and golden, with good grill marks on the kernels. Allow to cool a bit, then cut the kernels off the cobs. Set aside.


Halve avocados and remove pit. Cut avocado into a dice inside the skin, then scoop out with a spoon.

In a bowl, combine corn kernels, diced avocados, diced tomato, jalapenos, minced garlic, lime juice, salt, and cumin. Stir gently to combine. Add cilantro and stir in.

Yum...
Yum Yum Yum.  Supyumguac!

Dig In!  The roasted corn added a crunchy, sweet, smokey flavor that just cannot be beat!  The guac on it's own without the corn is a great recipe, but add the corn and it's over the top guac!  If you make anything this weekend, this should be on the menu!  Easy, inexpensive and full of flavors!

Review (1-10, 10 being awesome!)
Taste: 11
Ease: 10 (just time consuming chopping, but well worth it)
Cost: 10 - all of the groceries have corn on sale right now *I got 4 for $1 yesterday*

We've already done this recipe twice in the past month. It's a new summer staple... and maybe a fall staple... a winter one too, oh, and don't forget spring!

Have a great day!  Hope it's full of fun, laughter and delicious food!
Andrea

Sunday, May 27, 2012

Foodie Week - Memorial Weekend Treat

Hello!

I don't know what it is, but as soon as Memorial Weekend came into focus, I knew that I wanted to make a strawberry rhubarb desert... I don't know if it's the berries, the sweet and tart mixed or the bright pinky-red color that screams "Summer!" to me, but I do know that it's a must this weekend!

I didn't get this recipe from Pinterest, it's actually from my Aunt Di (holla Aunt Di!), who's great at absolutely everything that she does!  She'll deny this, but it's true.  She's sweet, funny, smart, charming, crafty, organized, an awesome chef, an even awesomer (yes, that's a word today) gardener, and an overall beautiful person in every way.  If Mr. Darcy knew her, he'd say that she's practically perfect in every way *sigh, Mr. Darcy* - okay, so here's the Rubi-Berry Cobbler...


Aunt Di's Rubi-Berry Cobbler
(3 qt. casserole dish)

Ingredients:


Filling:
1 Cup Sugar
4 1/2 Tablespoons Flour
16 oz Frozen Sweetened Strawberries *make sure they say sweetened on the container*
4 1/2 Cup Chopped Rhubarb

Crumble:
1/2 Cup Butter
1 1/2 Cup Rolled Oats
1 1/2 Cup Flour
1 1/4 Cup Brown Sugar
1 1/2 Tsp. Cinnamon
1/2 Cup Chopped Nuts (I used pecans, but it's your call)

Directions:

Heat over to 350 degrees.

In a 3 qt. dish, combine sugar and flour. 

Add frozen berries and cook in oven for 4 minutes.

Take out of oven and stir berries, which should be melted now.
Add rhubarb and mix with berry mixture.
Set aside.

Now melt your butter and stir in remaining ingredients until mixture is nice and crumbly.
Sprinkle crumb topping onto strawberry/rhubarb mixture...
Looking good...

Now put your cobbler into the oven for 10 minutes... your house will start smelling good immediately...  After the 10 minutes, take your cobbler out of the oven and let cool.  This is good stuff here...

Now dig in - if you have vanilla ice cream, put a scoop next to the cobbler.  Enjoy a taste of summer!

I can't really give this recipe a review - but if I did... it would be all 10's!!!

Thank,s Aunt Di for always sharing your knowledge!  You make me look good!

See you back here tomorrow for a yummy dip!  And since I've had so much fun with food week, I'm extending it just a little!

Andrea

Saturday, May 26, 2012

Foodie Week! Shredded Pork

Hello!

Phew, I almost forgot about my post today!  That would have been horrible because... my recipe today is so delicious!  Yep, delish delicious!  It's from one of my favorite people... Ree of The Pioneer Woman!  The funny thing is, both Alan and I watch The Pioneer Woman on The Food Network... it's out Saturday night show.  We both enjoy her style of cooking, down home without a lot of fuss but full of flavor!  I even received her second cookbook for Mother's Day! 

Okay, let's get to it!
{Photo and Recipe courtesy of thepioneerwoman.com via Pinterest.com}

Spicy Pulled Pork
Ingredients
  • 4 pounds (up To 7 Pounds) Pork Shoulder
  • 1 teaspoon Dried Oregano
  • 1 teaspoon Ground Cumin
  • 1 teaspoon Chili Powder
  • 1 Tablespoon (to 2 Tablespoons) Salt
  • Pepper To Taste
  • 3 cloves (to 4 Cloves) Garlic
  • 1 Tablespoon (to 2 Tablespoons) Olive Oil
  • 2 Tablespoons (to 3 Tablespoons) White Wine Vinegar
  • 1/4 cup Brown Sugar
  • 1 whole Onion
  • Lime Wedges

Preparation Instructions

Rinse and pat dry the pork shoulder.

To begin, just throw the dried oregano, cumin, chili powder, salt, black pepper, garlic, olive oil, white wine vinegar and brown sugar into a food processor or blender. (I happen to love brown sugar in my cooking, but you can decrease or omit it if you like.)

Cut one onion into quarters and put it in the food processor with the spices. Blend mixture until totally combined and then pour it over the pork shoulder.

Now rub it into every nook and cranny of the meat, tucking it under folds an in crevices. Let no stone go unturned.

Then place the pork into a roasting pan or Dutch oven and add a couple of cups of water. Cover tightly and roast pork at 300º for several hours, turning once every hour.

When it is fork tender, crank up the heat, remove the lid, and roast it, skin side up for another 15 to 20 minutes to get the skin crispy. When it’s done, let it rest for 15 minutes before shredding.

Shred the pork shoulder (two forks work well). When it’s all shredded be sure to pour the juices all over the meat.

Serve with warm tortillas, lime wedges, sour cream, pico de gallo, guacamole, tomatillo salsa … whatever makes your skirt fly up!

And here's what I did... Also, I'm using her photo's because I didn't take any - it was a "Gotta make this while child fake naps" kind of cooking adventure... luckily it was quick and easy and, even though I had to make minor alterations due to our limited supplies, it was still super tasty!

Okay, so here's what you're supposed to have on hand...

Ya, you know it's not my photo because our kitchen has the lighting of a dungeon...

I had almost all of that... except the onion and the white wine vinegar... so I omitted the onion (I was sad to do this) and used red wine vinegar because I had to get it done.

I did create the rub like she did, except, since I wasn't using an onion and since I was trying to make as little noise as possible (remember my fake napper), I just mixed it all in a bowl by hand.  Whatever works into your life...  I rubbed the crap out of my pork with the mix - I figured that by rubbing it in like a pro masseur, that I'd be making up for the few ingredient switches.

Also, Ree put here's in a cast iron dutch oven... and while I covet this thought, I used my trusty crock pot.  We were planning a trip to the library and I knew that I couldn't leave the oven on while we were out - another Tim Gunn "Make it work" moment.

And, while the wonderful Ree plated hers with fresh lime slices, I threw it on our individual plates and placed a plastic shaped lime filled with lime juice on the table... yep, make'n it work on a slightly ghetto level.

I did, however, serve it with warm tortillas, homemade salsa, sour cream, rice and beans... so while I'm way less country and way more ghetto than Ree, I believe she would've been proud of the end result... empty plates!

Review 1-10, 10 being amazing!
Taste: 10 - super moist, tons and tons of flavor
Ease: 10 - easy easy - and I do feel like, even though I had to substitute here and there, it was an awesome dish - so I can only imagine what it'll be like when I do it the Ree way!
Cost: 10 - pork shoulder butt is cheap - I think it was $1.20/lb

Over all review - fantastic!  I have left overs and am going to make, gasp, enchilada's!  But I'll do a green sauce instead of the red sauce and make it more of a chile verde enchilada.  I love this recipe - it's my new stand by for pork roasts!

See you tomorrow!
Andrea

Friday, May 25, 2012

Foodie Week - Popcicle/Smoothie

Hello!

I'm sorry for the late post!  Today was a busy day, it seems that once Adam starts to feel better, we take complete advantage of it!  Luckily, we made our Pinterest Recipe this morning first thing, and kinda took a popcicle recipe and morphed it into a smoothie recipe AFTER I made the popcicles!  Okay, here's what I made today...

{Photo & Recipe courtesy of  therealityofskinny.tumblr.com via Pinterest}

Here's the Recipe:
Blend and freeze the following ingredients (don’t forget the sticks!): (Makes 6 servings)
  • 1 can pineapple chunks, in juice
  • 1 banana
  • 1 can coconut milk
  • 1/2 tsp vanilla extract
Calories: 117 per pop :)

Okay, so here's my turn:

I wasn't sure about the measurements for the pineapple or coconut milk, so we just grabbed the large can of pineapple (because we love pineapple around here!) and the larger size of coconut milk (there was a small one, I think 8 oz). 

I threw everything in at once, turned it on and blended.

Then filled popsicle forms and had a TON left over!  What to do... what to do...

I thought about it and figured that I might as well turn this into a smoothie... it wouldn't be too hard!  So, I threw about 8 strawberries and a few cups of ice into the blend and, well, blended.

Yum.

Here ya go - a dual recipe!  A recipe that you can have a little now and a little later.

Review: (1-10, 10 being amazing)
Taste: 8 - it was good, but it was labeled as the new crack and, while I've never done crack, I was expecting something mindblowing... it wasn't mindblowing but it was yummy.
Cost: 10 - few ingredients, nothing fancy and you get a TON!
Ease: 10 - so easy - it's hard to mess up something with 4 ingredients!

We'll be making these again, they'll be great this summer!

See you tomorrow with a yummy crockpot pork recipe!
Andrea

Thursday, May 24, 2012

Foodie Week - Veggie Enchilada Bake

Good Morning!

Okay, so after I admitted to being a Mexican food snob, I am now sharing a recipe for a veggie enchilada bake... so NOT Mexican food but SO FREAK'N GOOD!

I was so hesitant about this recipe, honestly.  As I was cutting, seasoning, baking I was wondering if anyone in my family would like this and if I'd be making PB&J after cooking in the kitchen for over an hour... it was needless worry!  Seriously, this recipe is sooo good!

{Photo & Recipe courtesy of  perrysplate.com via Pinterest.com}

Stacked Roasted Vegetable Enchiladas

Ingredients:

1 poblano chile, cut into matchsticks
2 red bell peppers, cut into matchsticks
1/2 head of cauliflower, cut into 1/2-inch chunks
1 small sweet potato, peeled and cut into 1/2-inch cubes (about 1 1/2 cups)
1 medium onion, halved and slivered
1 cup corn kernels, fresh or frozen
3 T heat-safe oil like grapeseed or coconut
1 1/2 tsp ground cumin
2 garlic cloves, minced
salt and black pepper
1/2 cup chopped fresh cilantro
2 cups homemade or store bought salsa/pico de gallo
2 ounces baby spinach leaves (about 2 big handfuls)
9-10 corn tortillas, halved (try making homemade tortillas!)
2 cups shredded cheese (I used a cheddar-Monterey Jack blend)
sour cream and thinly sliced scallions (green onions) for garnish, if desired

Directions:

Preheat the oven to 425 degrees F.

Lightly oil a large shallow roasting pan or rimmed cookie sheet.

Place poblanos, red bell peppers, cauliflower, sweet potato, onion, and corn kernels onto cookie sheet. Drizzle olive oil and sprinkle the cumin and minced garlic over top. Add a generous pinch or two of salt and black pepper, then use your hands to mix everything together. After everything is coated well, spread the vegetables evenly in the pan. Roast for 30-40 minutes until vegetables are tender and begin to brown in spots. Stir or shake the pan every 10 minutes for even roasting. Remove pan from oven and reduce oven temperature to 350 degrees F.

Prepare an 8x8x2 or 9x9x2-inch square baking pan with nonstick spray. In a small bowl, stir the cilantro into the salsa. Spread 1/4 cup of salsa into the bottom of the baking pan. Add a layer of tortilla pieces, to completely cover the salsa. Top with 1/3 of the vegetables, a handful of spinach, and 1/3 of the cheese. Make a second layer of tortilla, salsa, vegetables, spinach, and cheese. Top with with a layer of tortillas, salsa, vegetables, and cheese. Cover with aluminum foil.

Bake for 20 minutes. Remove the foil and bake another 10 minutes, until cheese is melted and everything is heated through.

Let it sit for 5 minutes and cut into squares. Serve with sour cream and a sprinkle of sliced scallions.
Serves 4-5

Okay, so good!  So, let me share the few changes I made...

I omitted the sweet potatoes - and I didn't miss anything.

I kept thinking about adding shredded chicken, but really wanted to stay as true to the recipe as I could, so I kept with just the veggies! 

The cutting was time consuming, I'm not going to lie... but once I could smell all of the different veggies roasting, I did not regret my time spent with the knife and board. 

I used olive oil because I didn't have any of the other oils listed in the ingredients.

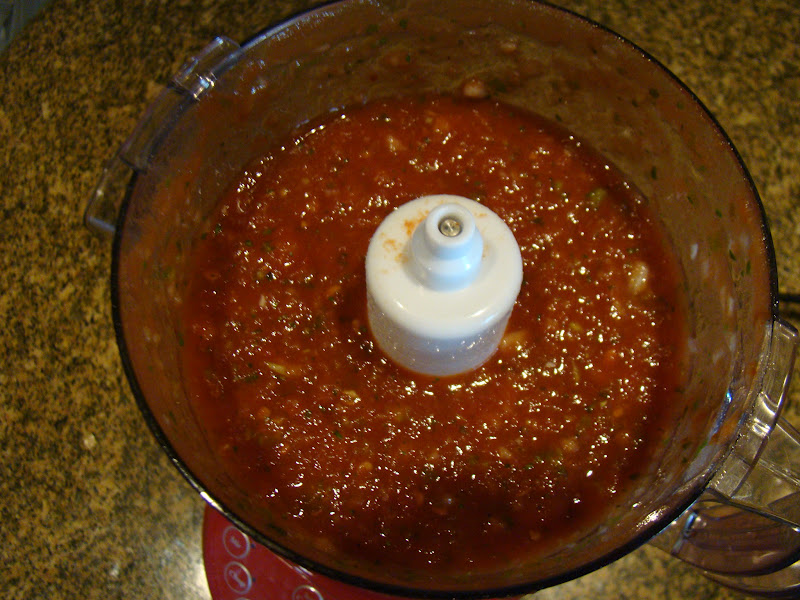
I made my salsa - we had all of the fixings and it's easy, so why not?

I probably used 2 or 3 times the amount of cheese because my boys love them some cheese!

Here are my pictures through the process...

My veggies, all diced and ready to be roasted.  It sure is pretty...

Yummy - we love homemade salsa around here!  I'll share this recipe another time, it's easy and good!


Fresh roasted veggies!  I love these - I usually put my veggies in a glass dish, but using the cookie sheet for the roasting made a few difference!


Here's the finished product - gooey cheese, thin tortilla's, homemade salsa... and a very happy tummy!  My husband loved it, my son was on the fence, he ate around the veggies so that he was only getting tortillas and cheese...

Review (1-10, 10 being amazing!)
Taste: 10
Ease: 8 - easy but time consuming
Cost: 8 - veggies are always expensive, but the cauliflower was super inexpensive... the red peppers were costly,  but if you make this recipe when veggies were on sale, then it would be no problem.

To sum it up, I'll make these again because they really were good but I don't think they'll be a weekly staple due to cost and time - but for special occasion's, definitely!

See you tomorrow with a yummy and healthy desert!
Andrea